Installing Windows on a OVH Dedicated Server is very easy. We can install Windows on a OVH Dedicated server in just 6 simple steps. I will guide you step by step on How to install Windows on OVH Dedicated Server. We are using 3rd party Windows ISO files for the installation. You can use your own files if you have or use our files for free.
This method also works for Kimsufi & So You Start dedicated servers. So, you can follow the steps below if you have servers on their datacenter.
You will be able to install
- Windows Server 2016
- Windows Server 2012
- Windows Server 2008 (Web Server)
- Windows Server 2008 (Standard)
- Windows Server 2008 (Datacenter)
- Windows 7 Ultimate
- Windows 8.1
- Windows 10 Pro
- Tiny Windows 10 Pro
We will add more servers files in future.
Let’s Start…..
Step 01: Boot Your Server Into Rescue Mode

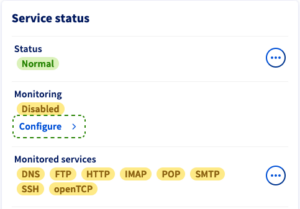
Step 02: Disable Server Monitoring
- Click “Configure” in the monitoring section.
- Click desable and save the changes.

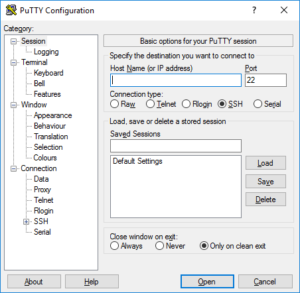
Step 03: Login to Rescue Mode with SSH/PuTTY

- Login to putty with the information you get in your email from OVH.
- After login to the server, you need to choose the Windows version and run these below command to install the Windows on the OVH dedicated server.
2024 Links Download
Tiny Windows 10 Pro:
wget -O- 'https://mirror.joodle.ovh/Download/TinyWin10.dd.xz' | xz -d | dd of=/dev/sda
Windows 10 Pro:
wget -O- 'https://mirror.joodle.ovh/Download/Windows10Pro.dd.xz' | xz -d | dd of=/dev/sda
Windows Server 2016 Datacenter:
wget -O- 'https://mirror.joodle.ovh/Download/WindowsServer2016Datacenter.dd.xz' | xz -d | dd of=/dev/sda
Windows Server 2022 Datacenter:
wget -O- 'https://mirror.joodle.ovh/Download/WindowsServer2022Datacenter.dd.xz' | xz -d | dd of=/dev/sda
Windows Server Versions
Username: Administrator
Password: www.Joodle.OVH-Password2024
Windows 7, Windows 8.1 & Windows 10 & Tiny Windows 10
Username: Admin
Password: www.Joodle.OVH-Password2024
Old Links Download
Windows Server 2016 Standard Evaluation (180 Days):
Windows Server 2012 R2:
Windows Server 2008 R2 Webserver:
Windows Server 2008 R2 Standard:
Windows Server 2008 R2 Enterprise:
Windows Server 2008 R2 Datacenter:
Windows 7 Ultimate Edition:
Windows 10 Pro:
Windows 8.1:
Use the following credentials to login:
Windows Server Versions
Username: Administrator
Password: Password147
Windows 7, Windows 8.1 & Windows 10
Username: Admin
Password: Password147
Step 04: Restart Server In Normal Mode
- When the full process on the putty is completed, go to the OVH dashboard.
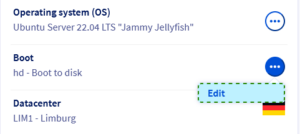
- In the boot section, select the Disk mode/normal mode and click save.
- Now, Restart the server from the status section.
- You have to wait 5-10 mins to server wake up. You can check the status via Ping to the IP.
Now, you have installed Windows successfully on the OVH dedicated server. You can connect to the Windows from your device/computer/laptop via Microsoft RDP software.
